Extensive Shrimp Farming Technique Improved in Two Phases
| Tue, 02 Feb 2021 - 17:03
Applying the improved extensive 02-stage shrimp farming process into production is one of the step-by-step solutions to improve survival rate, increase productivity, and increase the efficiency of extensive tiger shrimp farming model, especially respond to the current climate change situation. To help shrimp farmers to be successful, please introduce improved extensive shrimp farming techniques in 02 stages:
I. ANIMAL SYSTEM DESIGN
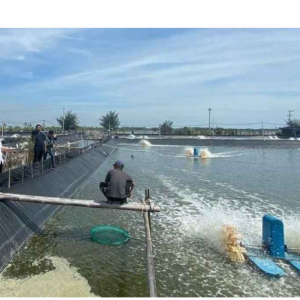
- Square feeding: Area 5,000 - 10,000m 2 .
+ Canal area: About 30 - 35% of farming area.
+ The farming square is large (width width), so additional ditches should be designed.
+ Depth of water level: Above the wetland> 0.5 m, below the canal 1.2 - 1.5 m.
+ Sewer or bubble pipe: 1-2 culverts or balloon pipes with timely water supply and drainage.
- Sedimentation pond: Occupying 10 - 15% of the farming square area (can make use of garden ditches or water supply canals as a settling area), in order to deposit alluvium, contain water to treat pathogens before feeding into the farming square water source.
- Nursery pond: Used to rear shrimp seed, help shrimp gradually adapt to a square environment, easy to care for, manage in a small period, control the amount of seed before moving to a farming square. Depending on production conditions, density, nursing time, nursery pond design, appropriate oxygen supply system (nursery ponds can be made of earthen ponds or nursery tanks).
+ Earth pond: Area 500 - 1,000 m 2 , depth: 1.0 - 1.2 m
+ Nursing tanks, canvas ponds: Area 50 - 100 m 2 , depth: 1.0 - 1.2 m.
Nursery ponds can be made of earthen ponds or nursery tanks, lined with canvas
Also read: Shrimp Farming Techniques in Floating Tanks
II. PHASE I (nursery)
1. Stitch preparation:
1.1. Soil pond:
- The nursery pond is reinforced carefully, the slugs are removed from the pond bottom and compacted to be flat, the corners of the pond are elected, drained 2-3 times before draining the water to apply lime.
- Apply lime CaCO 3 at a dose of 500 -1,000 kg / ha (depending on soil pH), and dry the pond bottom for 7-10 days.
- Get water into the pond from settling pond through filter bag, reaching a depth of 1.0 - 1.2 m to remove fish and other harmful organisms to shrimp. Run the fan continuously for 3-4 days, 4 hours a day to let the eggs of organisms in the water fully hatch, then proceed to kill bacteria (disinfectants are not in the list of banned use of the Ministry of Agriculture and Rural Development. ). 2 days later proceed to cause watercolors.
- Next, culturing microorganisms and adjusting environmental factors accordingly, we prepare to stocking (pH 7.5 - 8.5, alkalinity 100 - 160 mg / l, transparency 30 - 40 cm) , salinity 10 - 25 ‰)
Also read: Aquamimicry: A revolutionary concept for shrimp farming
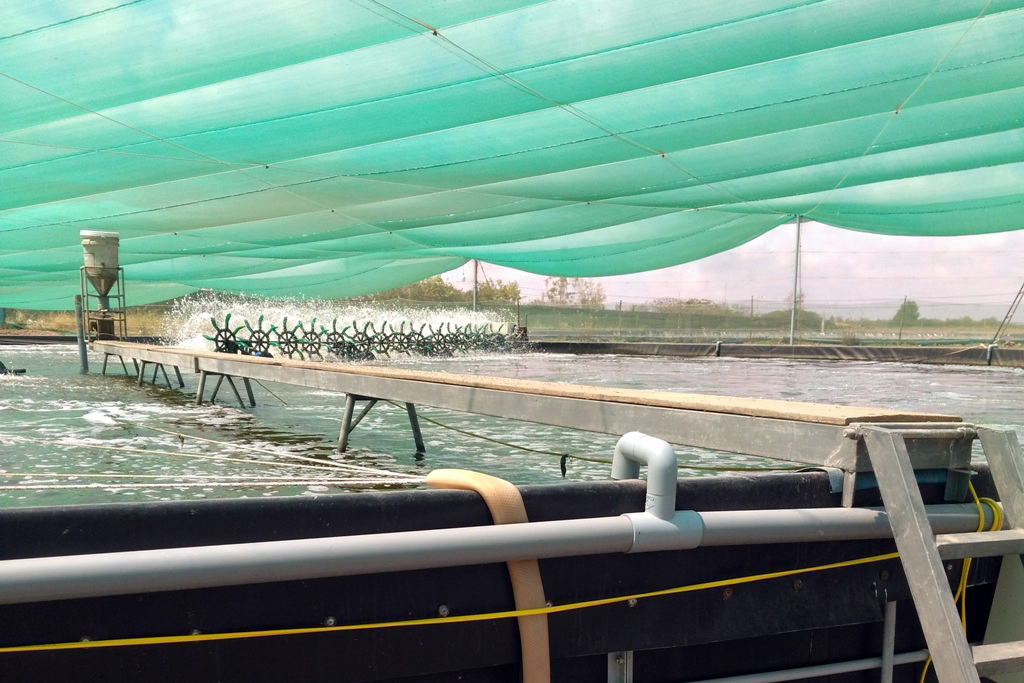
1.2. Nursery tanks, canvas ponds:
shrimp farming, shrimp farming techniques, shrimp farming 2 stages, model of shrimp farming, extensive shrimp farming
The seedlings are reared using Biofloc technology.
- Water is supplied from the pond to the nursery tank through a filter bag, then treated before nursing.
- How to create Biofloc: Use a mixture of 0.5kg feed 0 + 3kg molasses + 2 liters of water + 01 microbiological pack (227 grams / pack), incubate for 10 - 12 hours without aeration, use continuously 3 day in the morning. During this time, continuously aerate to create Biofloc, then check the medium accordingly before stocking.
- To create and maintain Biofloc in the nursery stage, it is necessary to provide more carbon sources to the pond to stimulate the growth of heterotrophic bacteria, nitrogen will be absorbed through the protein synthesis of microorganisms. There are many sources of materials that can be used to feed carbohydrates into the Biofloc system, including molasses or other sources. A quick and easy source of organic carbon that breaks down is best (molasses). At the same time, combining with microbiological sources (heterotrophic bacteria in the Biofloc system) aims to create Biofloc for sustainable development.
2. Select seed and stock
- Choosing breeds: You should choose to buy seed shrimps with clear origin from certified quality assurance facilities.
- Stocking: Breeding density: Soil pond: 30 - 80 animals / m 2 ; lined ponds, nursery tanks: 1,000-2,000 animals / m 2 .
Also read: Shrimp Aquaculture and Competitive Exclusion Of Pathogens
3. Care and management
3.1. Feeding:
Lined canvas ponds, nursery tanks:
- The amount of feed is calculated for 100,000 shrimp PL15:
+ First day: 300g
+ From day 2 - 10: Every day increase 50g
+ From day 11-20: Every day increase 150g
+ From day 21 - 30: Every day increase 300g.
Pond: Feeding dose 1 - 1.5 kg / 100,000 seed, increasing from 5 to 10% of feed per day.
- Size of feed for shrimp according to each stage according to the manufacturer's instructions.
- Feed shrimp 04 times / day:
+ 1st time: 05h00 - 06h00, 30% of total food amount of the day.
+ 2nd time: 9h00 - 10h00, 20% of total food amount of the day.
+ 3rd time: 15h00 - 16h00, 20% of the total amount of food in the day.
+ 4th time: 20h00 - 21h00, 30% of the total food amount of the day.
(Note: depending on environmental conditions, weather, shrimp health so we can balance the amount of food accordingly).
- For forms of nursing on tanks, canvas, daily siphon and change about 10-20% of the water.
- After about 20-30 days of age, transfer the shrimp to a square stage 2 culture.
Also read: Evaluating Plant Protein Sources Replacing Fishmeal In Juvenile White Shrimp Diets
3.2. Management of environmental factors
- The pH factor: Test 2 times / day.
- Alkalinity, NH 3 , H 2 S: Check once every 7 days.
- In the nursery process, it is necessary to add lime, potassium minerals, ... to stabilize the environmental factors.
- Periodically 7-10 days to use probiotics to clean the pond environment.
3.3. Management of shrimp health
- Observe every day farmed shrimp, especially the shrimp appendages such as beard, cow's feet, swimming legs ...; color; crust; operation of shrimp ... to detect abnormal symptoms and provide timely treatment.
- Every day add a number of products such as: Vitamin C, synthetic minerals, intestinal enzymes, liver supplements, increase resistance ... to the diet to help shrimp have resistance and grow well.
III. PHASE 2 (Growing commercial products):
After 20-30 days of nursing time, shifting shrimp to square (phase 2), farming density: Improved extensive shrimp farming: 06 shrimp / m 2 ; extensive shrimp farming, shrimp - forest, shrimp - rice 03 heads / m 2 .
During the culture process, always maintain a suitable water color and transparency (transparency 30 - 40 cm, water is light green or light brown) to create a natural food source in the shrimp square during the culture period.
For improved extensive shrimp farming, depending on the development stage of shrimp, industrial feeds with appropriate protein and feed sizes are used throughout the culture process. When shrimps are 1 - 1.5 months old, supplement feed for shrimp, use industrial feed at dosage of 3-5% of the weight of shrimp herds; Add minerals, vitamins, digestive enzymes to feed, help shrimp gain weight quickly, increase resistance and develop well, limit disease outbreaks on shrimp.
Regularly check the operating status, health of the shrimp, check the environmental factors of the farm such as: pH, temperature, transparency, alkalinity, ...; regularly check embankments, water supply and drainage culverts for timely treatment measures; periodically 10 - 15 days using probiotics to clean the water environment in the farming square.
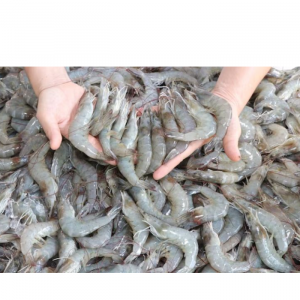
After 4 - 5 months of culture time, shrimp reaching the size of about 30-40 shrimp / kg, then harvest (can be harvested or collected entirely).
Source: Tepbac.co.id


